Simple Processing on EAA Adjusted Images
Note: the following image was captured using a Seestar S30-Pro, which is a 30mm f/5 lens (only 150mm focal length). 16m integration in EQ mode with 20s exposures.
The holy grail of astrophotography is to save all of the individual light frames you capture and re-stack them into a new image. If you have the time, tools, expertise and all of the saved images, you can do better than the techniques I’m about to show you.
On the other hand, personally, I’d rather get a root canal.
I adore the process of EAA… watching a new target build on my screen as I capture and stack it in real time. I’ve dabbled with full astro-processing and find it boring.
But I’ve since learned — taking only a few minutes per image — you can make substantial improvements by working on the final image from an EAA session — in this case a jpg taken with a Seestar S30-pro.
Below, I’m going to provide an example of my basic workflow that fits most EAA galaxy captures with minor variations. The basic steps are:
- Crop
- Denoise
- Stretch (make brighter)
- Sharpening (bring out fine structure)
- Adjust levels (darken background and improve contrast)
- Adjust vibrance (tweak color)
- Final Tweak (final NR and Tone Boost)
Each step takes only a few seconds, and a typical image can be completed in 5-10 minutes.
Below, I’ll show you how to download these tools, and take you step by step through the process. There’s only one paid tool, Noise-X-Terminator at $59. Everything else is either free or “pay what you want”.
Recommended Tools
My recommended tool-set starts with the Affinity Suite. This is a fully integrated, professional-level photo editor, vector graphics package, and desktop-publisher which get installed together. Since 2015, it’s been a much more affordable alternative to Adobe’s Creative Suite. Now in Version 3.0, it’s utterly affordable, as it was acquired in 2025 by Canva, and is completely free to download and use. The photo app delivers significant astro features including 64-bit FITS support.
Download Affinity SuiteJames Ritson has been Affinity’s astro application consultant, and has written an extensive library of macros to process astro images, now in Version 20. It’s a very useful library, and has always been free (though be sure to send James a donation if you find it useful):
Ritson Macros DownloadNebula Photos provides a very good video tutorial about downloading, installing, and using Affinity with the Ritson macros that you can find here:
Nebula Photos Affinity TutorialFinally, while Ritson does provided some noise-reduction routines, nothing comes close to NoiseXTerminator. It’s the only “paid” routine I use regularly, and strongly recommended. You need the “Photoshop” macro which runs perfectly in Affinity. You can download a fully functional 30-day trial version that leaves a watermark, if you want to test it first. But I find its performance utterly amazing, getting rid of terrible noise, and leaving behind what to my eye is a perfect rendition of the underlying signal.
NoiseXTerminator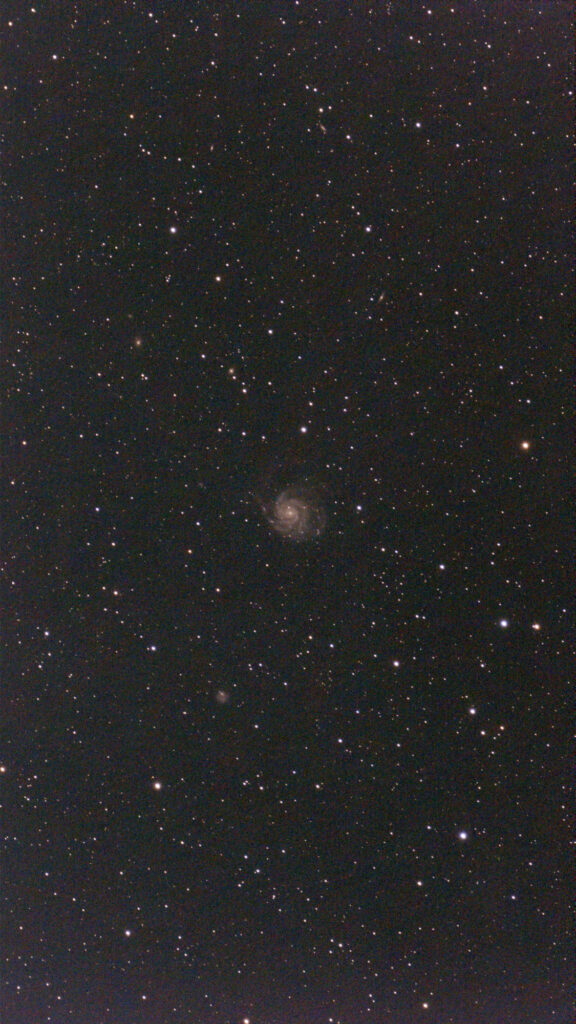
Getting Started…
This example was captured on a so-so night at an MHAA monthly star party at Lake Taghkanic State Park. It had rained in the late afternoon, and as I drove east towards the park just before sunset, there were low cumulus clouds covering much of the eastern sky. By the time I reached the Park, these clouds were gone.
Transparency suffered from such late clearing. This is normally a Bortle 4.3 site. But the huge amount of moisture still in the mid-layers were lit up by light domes from Poughkeepsie in the south, Hudson in the West, and Albany in the North, resulting in banding.
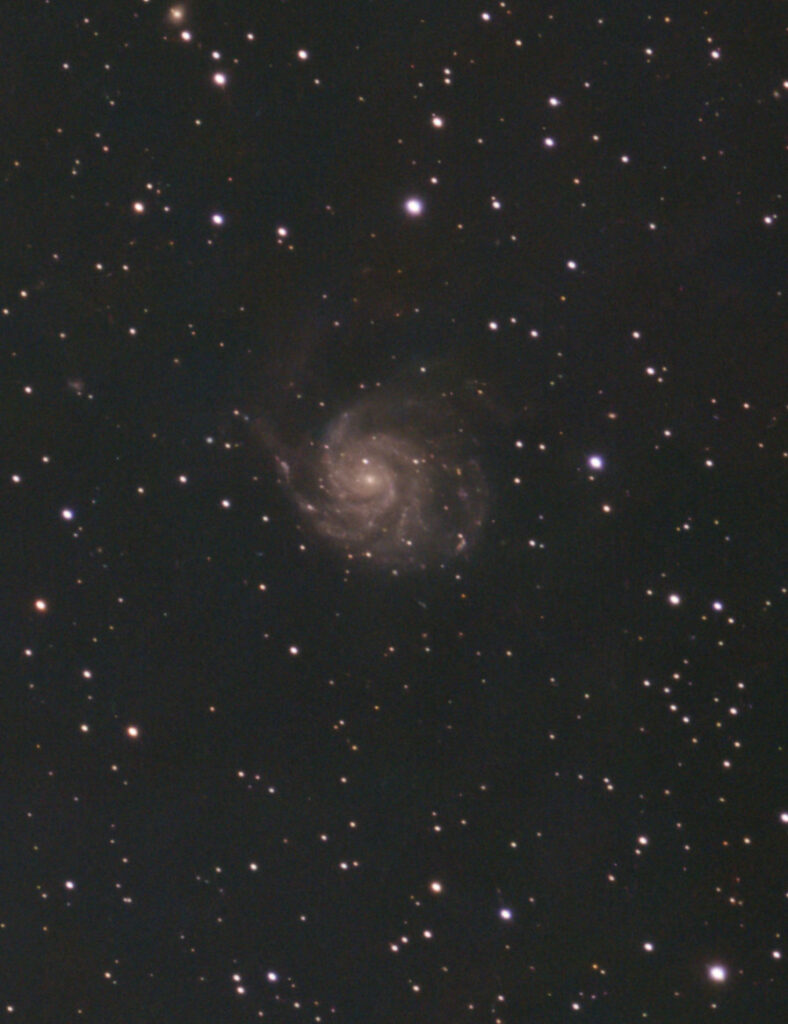
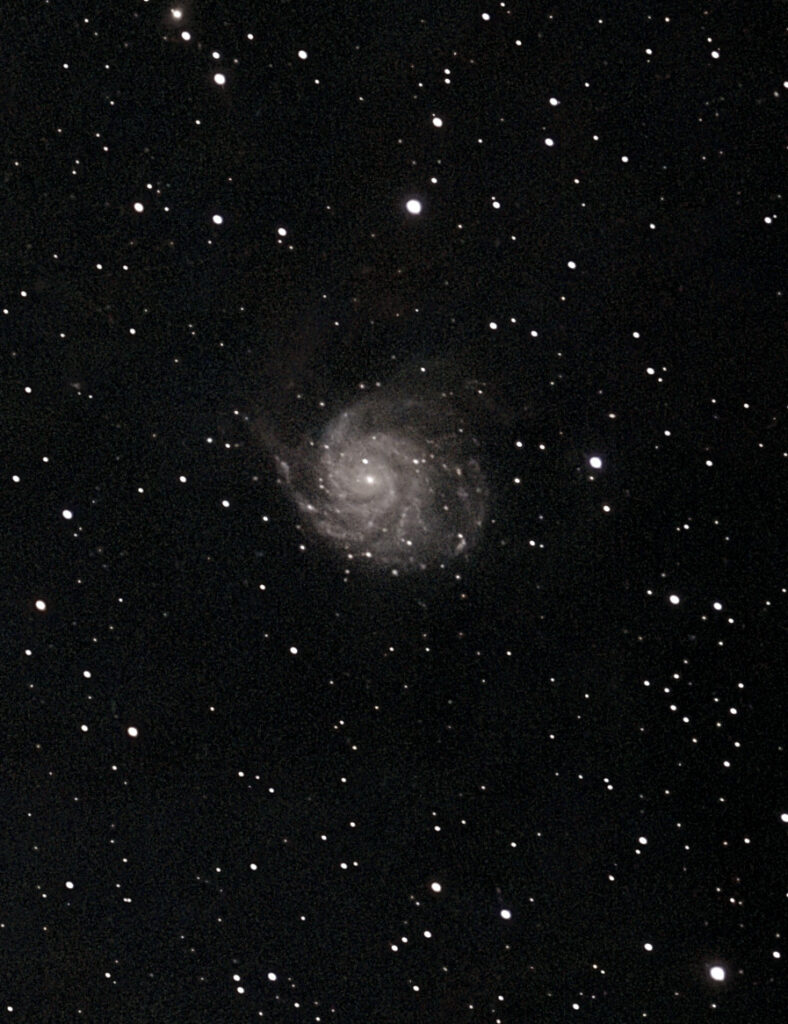
Taken using an S30-pro, with only 16 minutes of integration, the image has a bunch of issues. But to start, M101 is hard to see on the screen, being so tiny.
Cropping the image
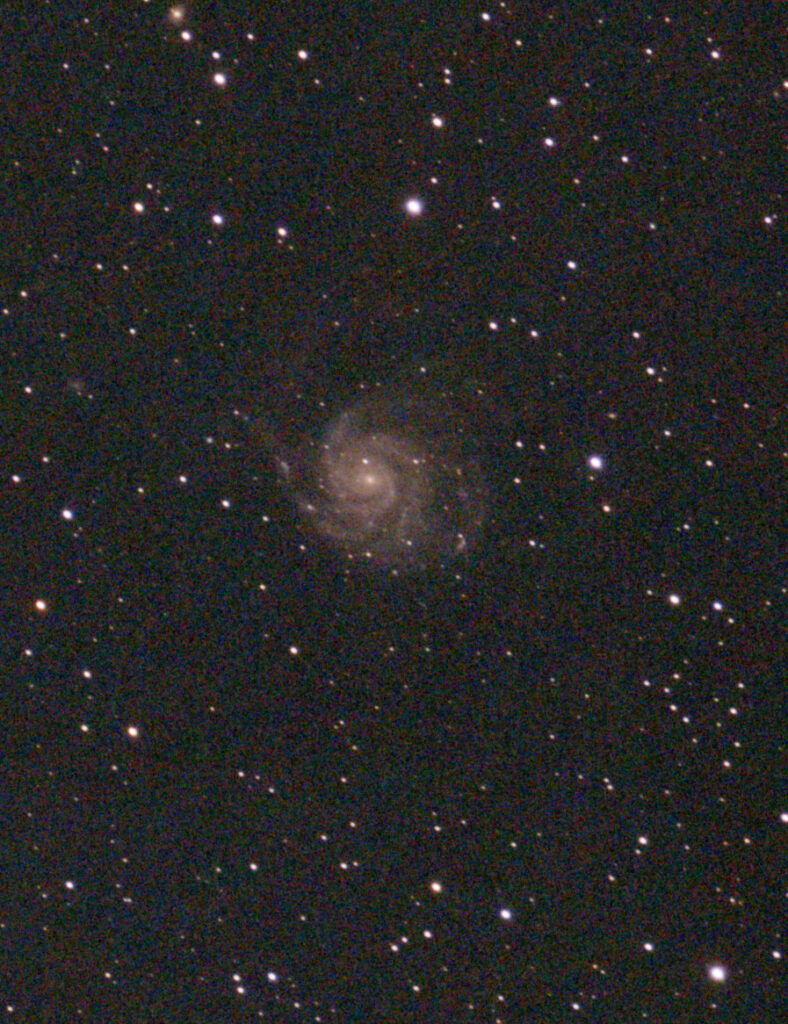
Here we’ve cropped using Affinity’s native Crop Tool. This is a non-destructive tool that works by reducing the image canvas size to focus-in on the area you select. This is a powerful tool with lots of options… you can specify that the tool preserve the current image proportions, a fixed size, a fixed ratio, or unrestricted boundaries. At any time in the future you can “undo” it by altering the Canvas size (\Document\Resize Canvas\)
Once cropped in, the problems with the image become more evident: noise, color banding in the background, and poor contrast between M101 and the background. It’s even more obvious if you zoom in. We’ll deal with these issues in subsequent steps.
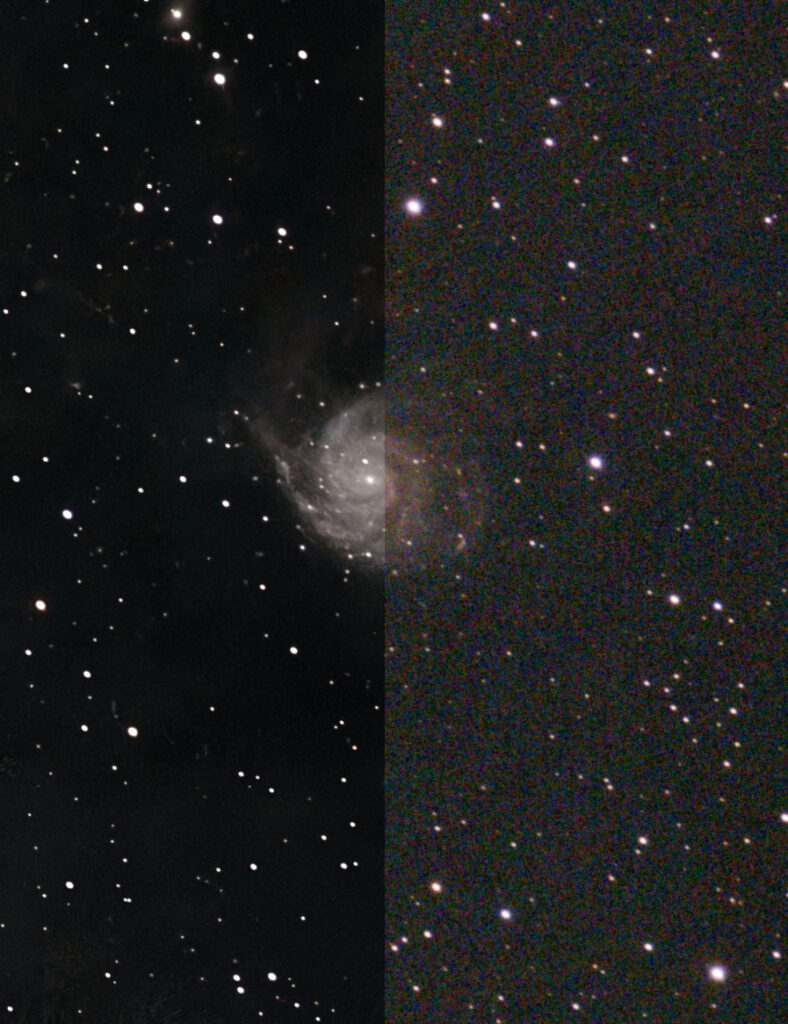
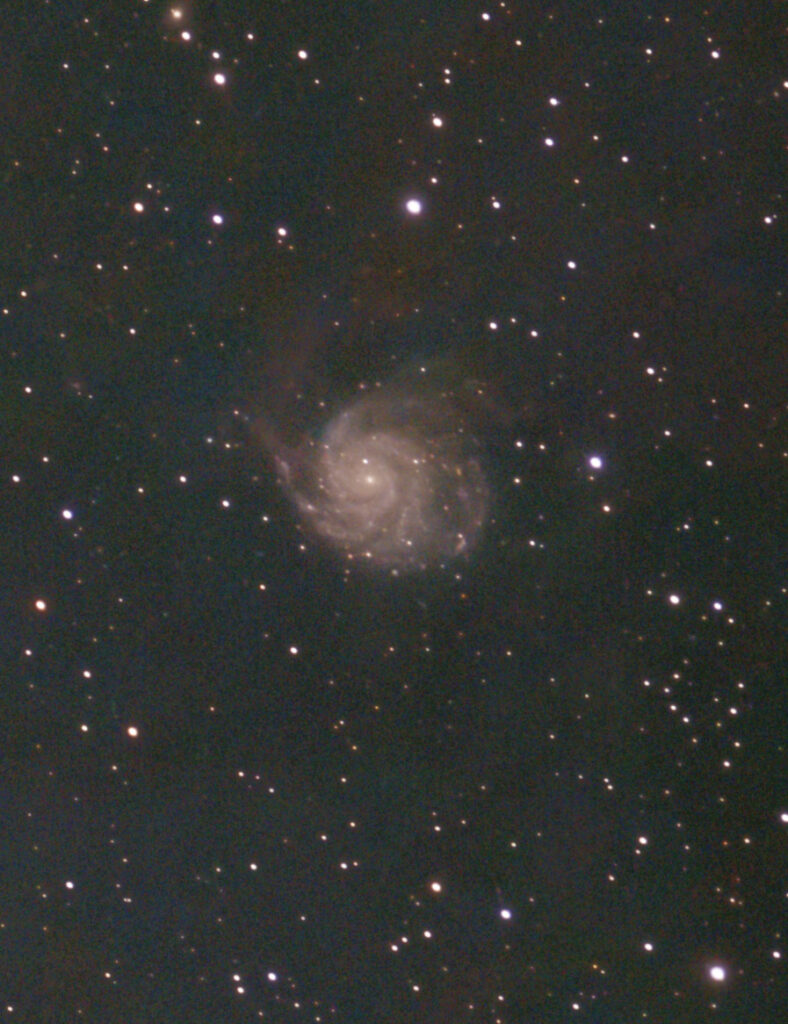
Applying NoiseXTerminator to reduce noise
The image at left shows the result of applying NoiseXTerminator (compare it to the previous image). Try zooming into each image in turn: the difference becomes obvious with enlargement.
NoiseXTerminator requires a rasterized image layer to work, and is destructive. I suggest creating a new pixel layer: option click on the Background Layer in the Layers Panel, and select the “Merge Visible” option.
Then, if you have NoiseXTerminator installed, make sure the newly created pixel layer is selected and select from the following menu sequence: \Filters\Plug-ins\RC-Astro\NoiseXTerminator\.
This will bring up a NoiseXTerminator settings dialog. When I first installed the routine I fooled around with these settings and decided on:
- Check “Use GPU”
- Set Denoise to 80%
- Set Interations to 4
I’ve never felt a need to change that, but feel free to play around it with your own settings.
Given the high noise level in this image, I decided to start with NoiseXTerminator. But you can apply it in later stages. Some processing functions introduce noise, so I will sometimes wait to apply it later in the workflow, especially for original images with moderate noise to start. In some cases, I will sometimes apply it twice in the same workflow: once early, and a second time as the final step when intermediate processing introduces additional noise. Yes, that sounds excessive, but the routine is so good at protecting the underlying data that it can be useful.
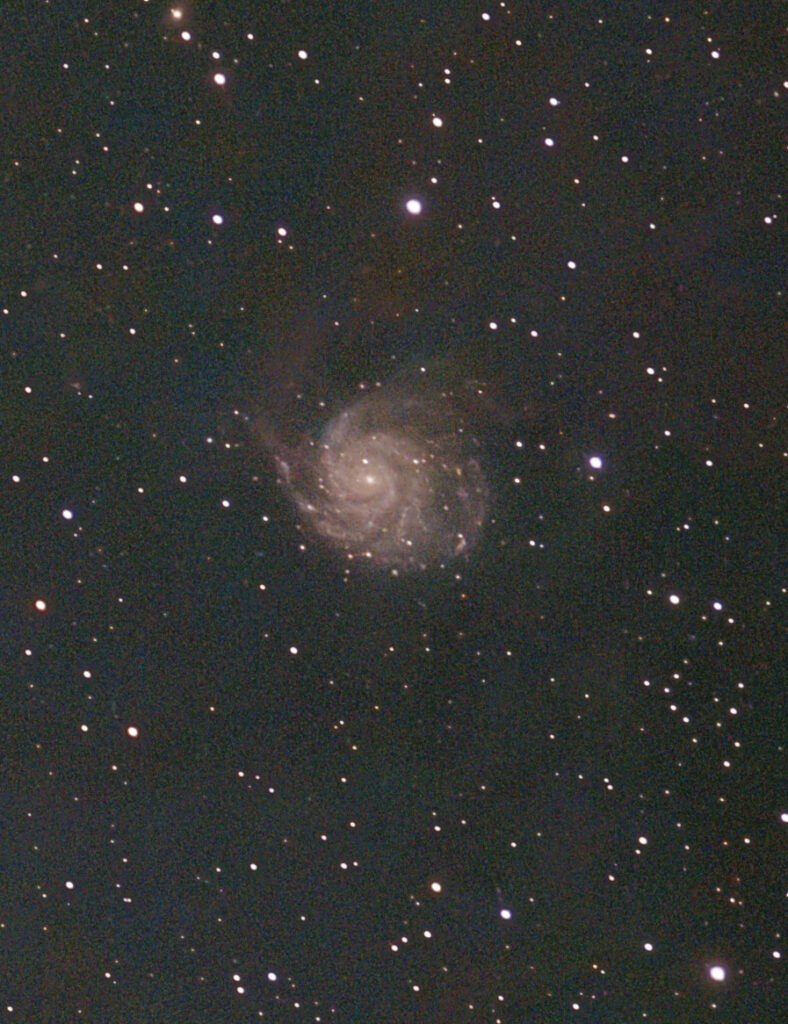
Brighten Using “Masked Curve Stretch”
One of the most powerful “brightening” routines in the Ritson Macros is “Masked Curves Stretch”. This applies a default set of curves adjustments to the selected layer (the one we just denoised). Note the tip of the “large” arm is now more distinct, the main disk is filled-in, and the contrast vs. background is improved compared to the previous image.
I tend to treat this macro as a “black box”, but you can customize the curves settings by clicking on the adjustment panel in the newly created layer icon in the Layers Panel. The only adjustment I routinely make is, if I feel the stretch is too much, I can lower opacity in the Layers Panel for the new layer; i.e. reducing opacity to 50%, will reduce the brightening by 50%.
In this case, I felt the default was just fine. Note that for very dim images, you can combine curve stretch with other Ritson macros, e.g.: the various “Tone Lift” or “Tone Boost” macros, not to mention “Brightness boost”, etc. All of these are non-destructive, so feel free to try them in combination.
Other Ritson macros let you play with the contrast. I didn’t bother here, but they can be useful in certain contexts, often in combination with the “Masked Curve Stretch”.
Bandpass Sharpening (fine) brings out details
The Ritson Macros include multiple sharpening routines. My favorite are the “Bandpass” sharpening tools which come in “Micro” to “Wide” variations which selectively sharpen features of different scale. I find the “fine” routine is the most useful, as it targets the features which most impact the perception of detail, while not introducing too much noise to the image.
If you start with a noisy image, these routines will exaggerate the noise. So I almost always apply them after using NoiseXTerminator.
Levels Adjustment to Darken Background
This is a standard Levels Adjustment, a core feature of Affinity Photo and virtually every photo editing package on the planet. The reddish banding is all “near black”. By shifting the black point slightly, you can virtually eliminate it, and improve the contrast between M101 and the background.
Note, you should always consider whether this is an artifact of the imaging, or an astronomical feature. In this case, I do think this is a function mostly of light pollution, but it can be a function of low-brightness nebulosity or dark nebulae, so beware.
Vibrance Adjustment to reduce color cast
To my eye, the previous image had a reddish brown cast which I didn’t like, so I went into the Vibrance Adjustment (another standard photo-editing feature) and lowered the color saturation
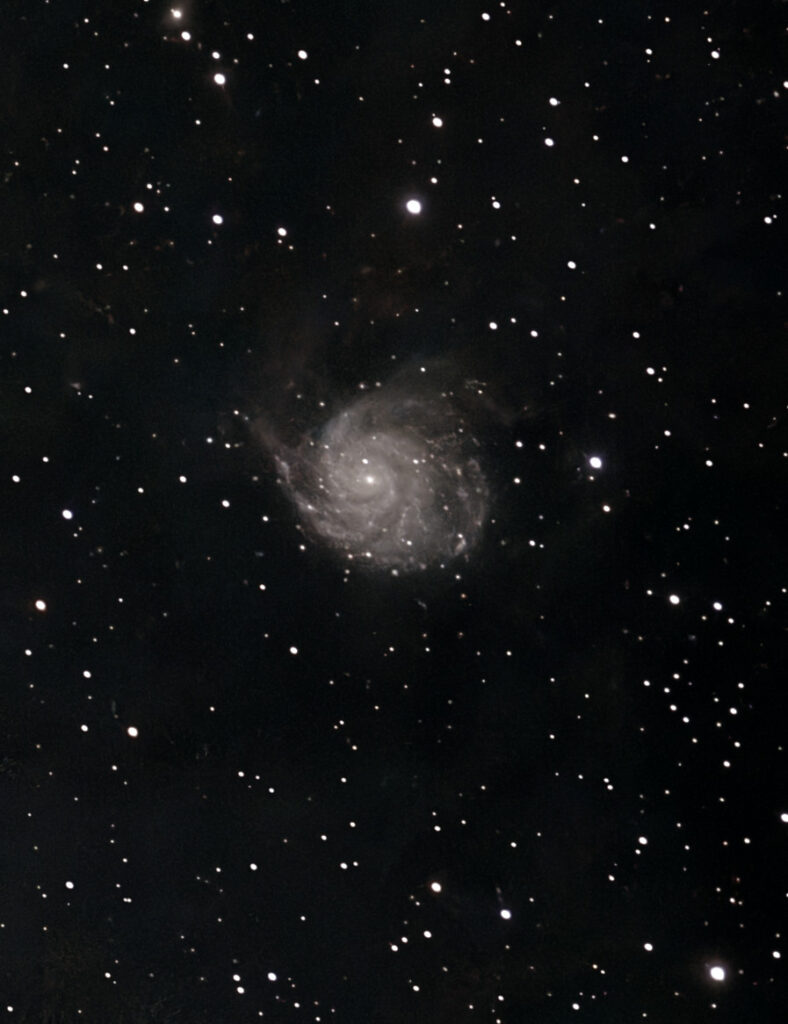
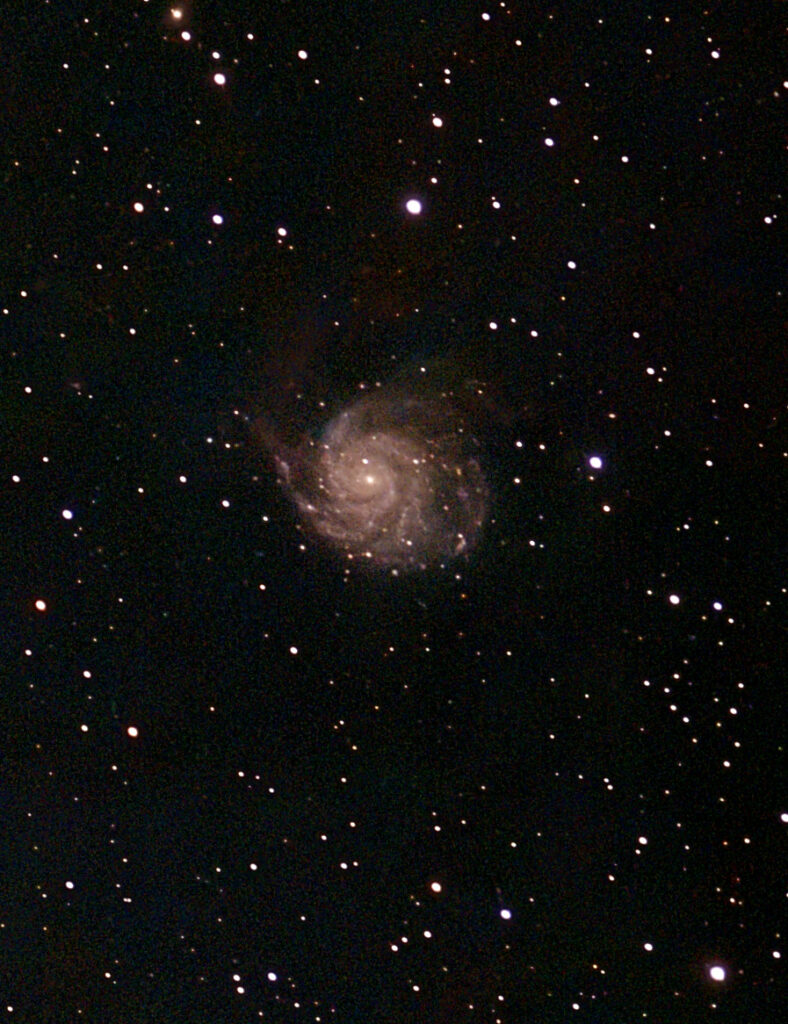
Final Tweaks: Second NR & Tone Boost
Taking a final look at the prior results I felt the sharpening had introduced some additional noise, and could use a slight brightness boost. So I repeated the NoiseXTerminator step and applied a Highlight Preserving Tone Boost (a Ritson Macro).
The tone boost looked better overall, but blew out some of the spiral structure, so I reduced opacity to 57% to achieve this final image.
Considering the conditions, limited integration time, and the fact that I was imaging with a 30mm aperture telescope, I’m pleased with the final result.